If you’re looking to take full control of your photography, understanding manual camera settings is essential. Manual settings allow you to adjust key parameters to suit different environments, giving you the freedom to capture your photos just the way you envision them. In this guide, we’ll walk you through the fundamental manual settings on your camera and how to use them effectively.

Understanding the Exposure Triangle
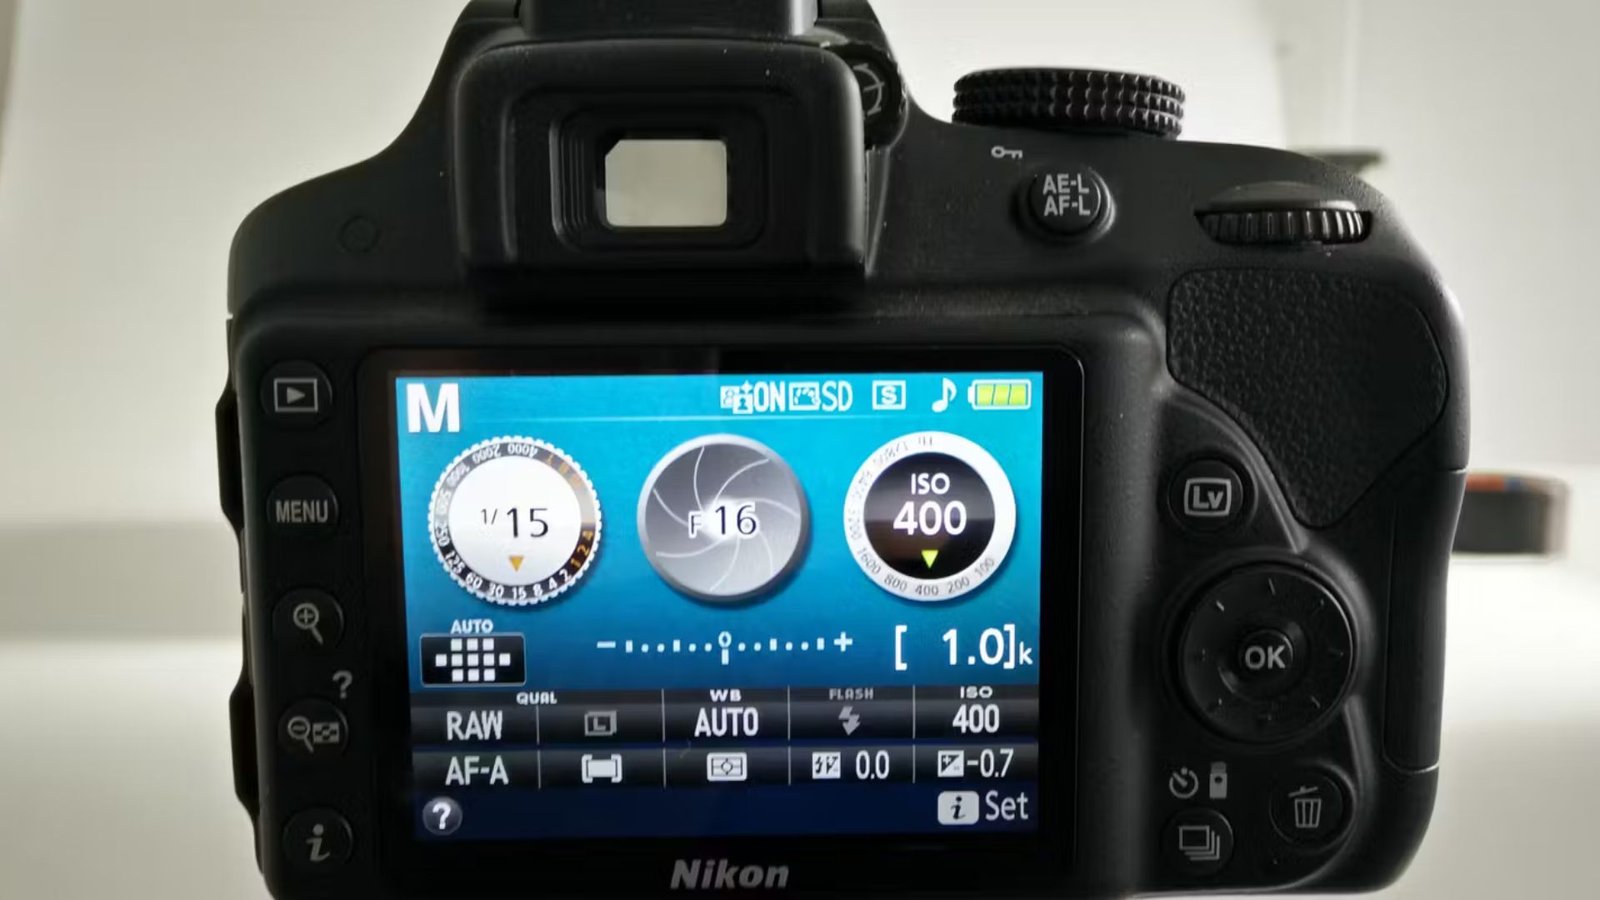
The heart of manual photography lies in the exposure triangle. The exposure triangle consists of three main settings: aperture, shutter speed, and ISO. These settings control how much light enters the camera, and they work together to create the perfect exposure for your photos. Let’s break them down:
- Aperture: The aperture is the opening in your lens that controls how much light passes through to the sensor. It’s measured in f-stops (e.g., f/1.8, f/4, f/11). A wider aperture (smaller f-number) allows more light, while a smaller aperture (larger f-number) lets in less light. Aperture also controls the depth of field in your image, or how much of the scene is in focus.
- Shutter Speed: Shutter speed determines how long the camera’s sensor is exposed to light. It’s measured in fractions of a second (e.g., 1/500, 1/60) or full seconds for longer exposures. Faster shutter speeds freeze motion, while slower shutter speeds create motion blur.
- ISO: ISO refers to your camera’s sensitivity to light. A higher ISO (e.g., 1600, 3200) allows you to shoot in lower light, but it can introduce noise (grain) into your photos. Lower ISO settings (e.g., 100, 200) are ideal for bright conditions and produce cleaner images.
Aperture Settings for Depth of Field
Aperture settings play a major role in controlling the depth of field, which is how much of your photo is in focus. A wide aperture (low f-stop) creates a shallow depth of field, resulting in a blurry background and a focused subject—this is perfect for portrait photography. A narrow aperture (high f-stop) gives you a deeper depth of field, where both the foreground and background are in focus, making it ideal for landscapes.
To control depth of field effectively:
- Use wide apertures (f/1.8, f/2.8) for portraits and creative blur effects.
- Use narrow apertures (f/8, f/16) for landscapes and wide scenes.
Shutter Speed for Motion Control
Shutter speed controls the amount of time the camera’s shutter stays open to expose the sensor to light. This has a direct impact on motion in your photos:
- A fast shutter speed (e.g., 1/500, 1/1000) freezes fast-moving subjects, such as athletes, animals, or cars.
- A slow shutter speed (e.g., 1/60, 1/30) can capture motion blur, which is great for creating artistic effects, such as the flowing motion of water or light trails from moving cars.
When using slower shutter speeds, it’s crucial to use a tripod to avoid camera shake, which can result in blurry photos.
ISO Settings for Light Sensitivity
ISO controls your camera’s sensitivity to light. A higher ISO allows you to shoot in darker environments, but it also increases the risk of noise or graininess in your image. It’s generally a good practice to use the lowest ISO possible to achieve clean, sharp images, especially in well-lit conditions. However, if you’re shooting in low light and need faster shutter speeds, you may need to raise the ISO to get a proper exposure.
- Low ISO (100-400) is ideal for bright conditions, producing sharp, noise-free images.
- Medium ISO (800-1600) works well in moderate lighting.
- High ISO (3200 and above) is suitable for low-light conditions but can introduce noise.
Balancing the Exposure Triangle
The key to mastering manual settings is balancing the exposure triangle. Increasing one setting—such as a wide aperture—may require you to adjust others, such as lowering the shutter speed or decreasing the ISO. For example, if you open the aperture to f/1.8 for a portrait, you may need to increase the shutter speed to prevent overexposure or lower the ISO for cleaner images.
A general approach to balancing the exposure triangle is:
- Bright conditions: Use a small aperture (high f-stop), fast shutter speed, and low ISO.
- Low-light conditions: Open the aperture (low f-stop), slow down the shutter speed, and increase the ISO.
Conclusion
Manual camera settings provide you with the creative control you need to capture stunning, professional-quality images. By understanding the exposure triangle—aperture, shutter speed, and ISO—you can manipulate your camera’s settings to suit various lighting conditions and create the perfect shot. Remember, the key to mastering manual settings is practice. The more you experiment with your camera, the better you’ll become at capturing images that reflect your artistic vision.